Hello everyone, welcome first series of NSX 6.1 installation and configuration with Best Practice. This series contain every steps involved for NSX deployment with screenshots. Since this installation is done in Lab environment we will try to include the all topics.
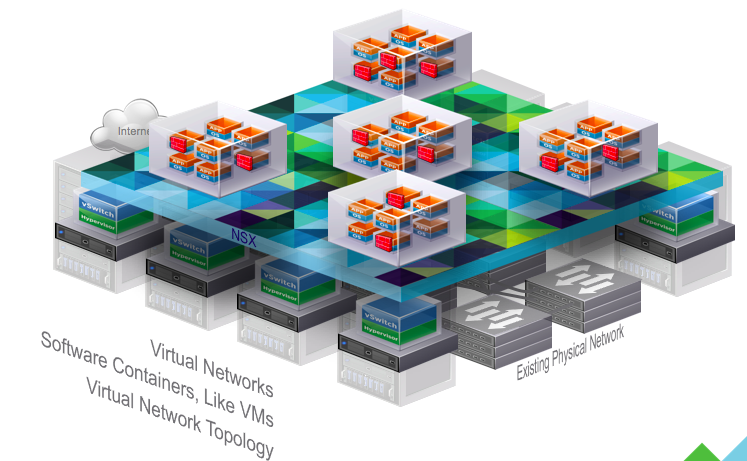
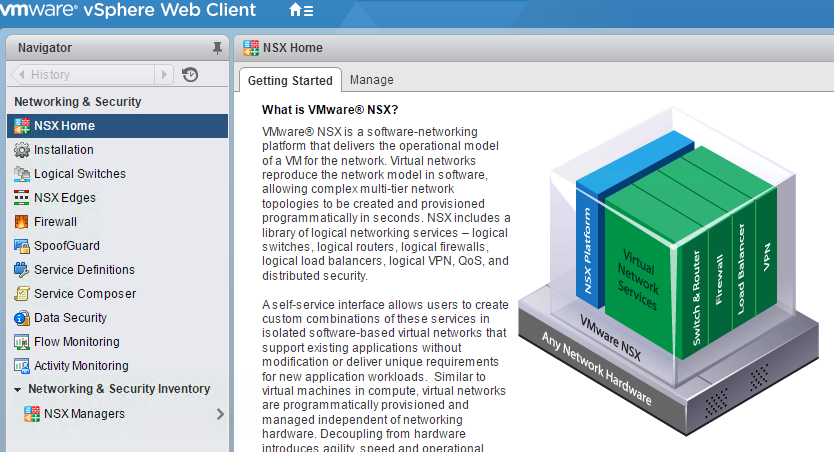
We all know NSX is key component for SDDC. Its a software based platform that provides logical network abstraction of the physical network and reproduces the entire network model in software allowing diverse network topologies to be created and provisioned in seconds.
In the regular infrastructure Physical hardware with hypervisor communicate with the physical router or switch to establish the connection and create any kind of rules.
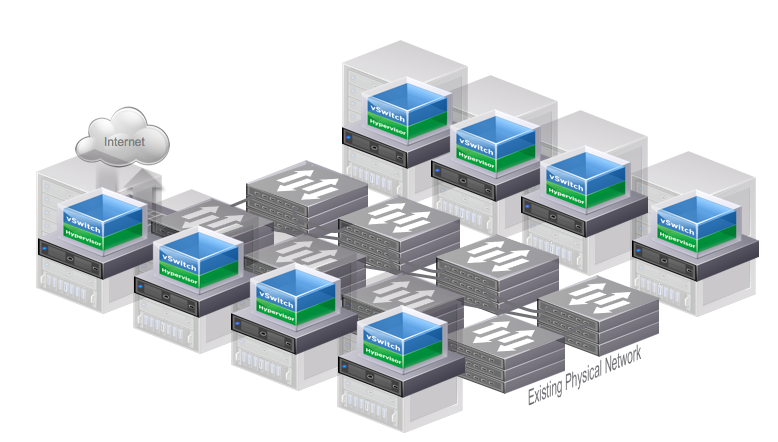
NSX resides on the top of Virtualization layer. Like a server hypervisor allows the creation of software Virtual Machines, the NSX Network Hypervisor enables the creation of software Virtual Networks. These virtual networks can be created, saved, deleted, restored, just like virtual machines but for the network.
In first part we will be installation and configuring NSX appliance.
Virtual Appliance Installation Requirements
Minimum Hardware Requirements
Minimum Hardware requirement to install NSX manager will be,
- CPU: 4
- Memory 12 GB
- Storage: 60 GB
Minimum Software Requirements
With the reference to interoperability Matrix from VMware, below are the software requirements
- vCenter 5.5 and above
- ESXi 5.0 or above
- VMware tools
Note: VMware Tools for vShield Endpoint and NSX Data Security, you must upgrade your virtual machines to hardware version 7 or 8 and install VMware Tools 8.6.0 released with ESXi 5.0 Patch 3.
All make sure you have all the necessary ports open and access to all the tools.
Installing Virtual Appliance
Download the VMware NSX appliance from VMware Download portal. Open the vsphere client and go to File and Deploy OVF Template

Specify the path of the OVF from the local system and next

Verify the Product version, disk size and Description and select Next

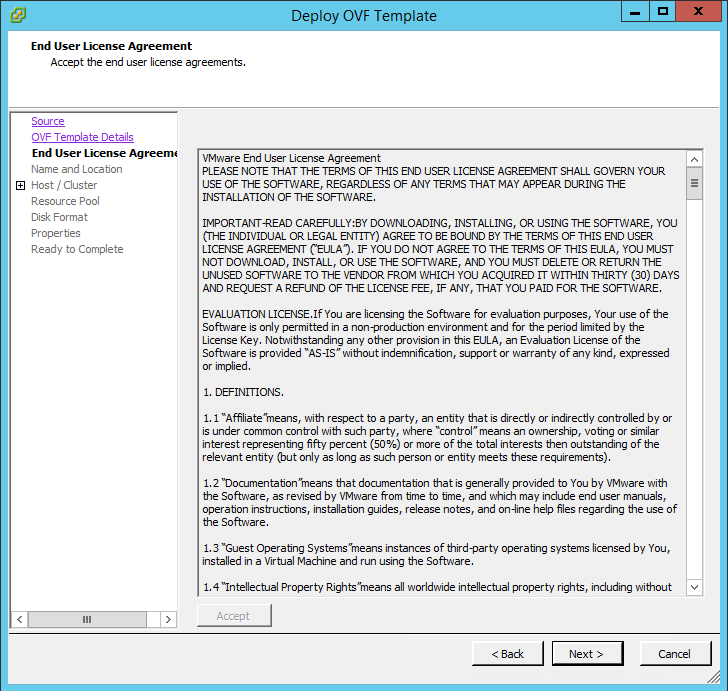
Read the EULA and select next
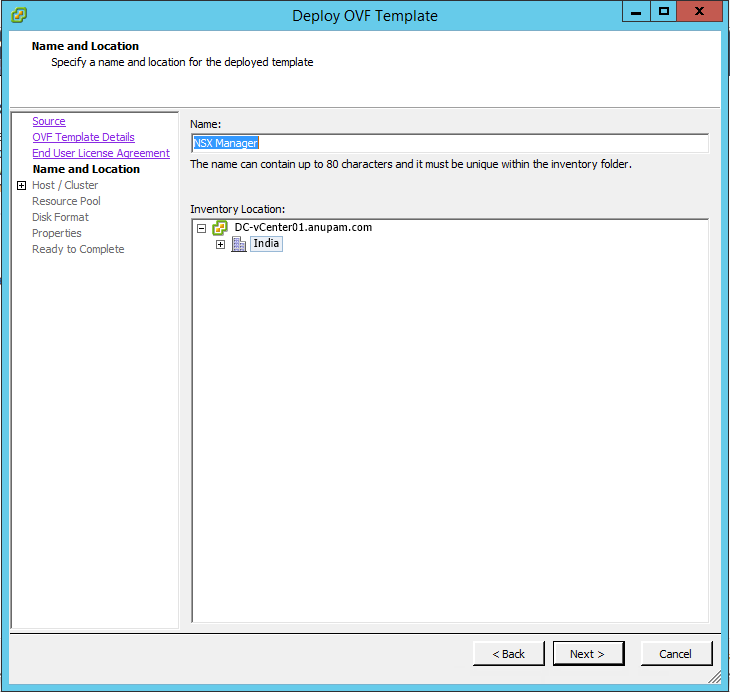
Specify the name of the NSX appliance
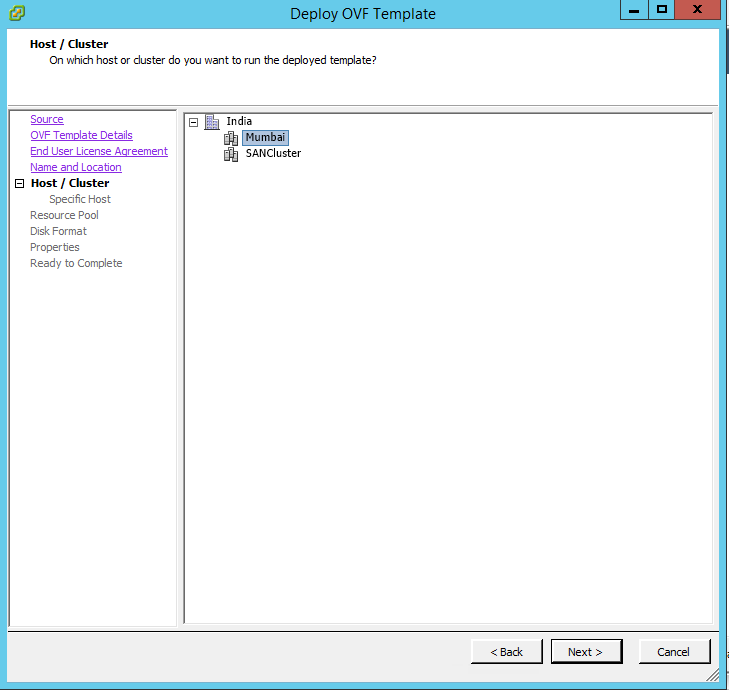
Select the Datacenter and Cluster Name
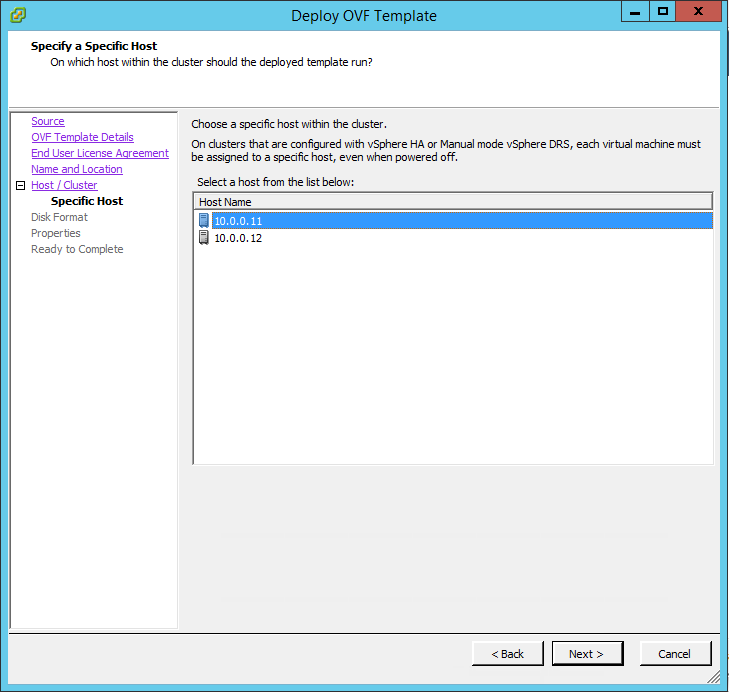
Select the ESXi host to deploy the template
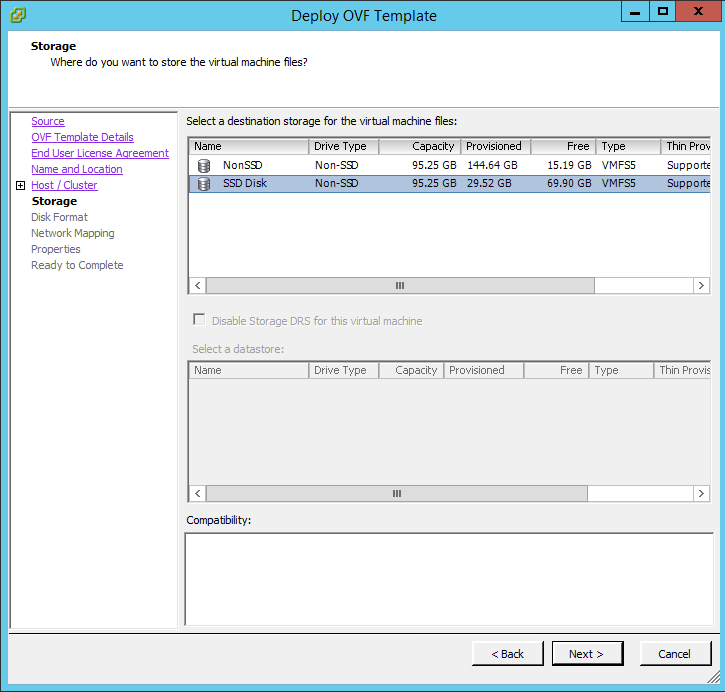
Select the datastore
Specify the disk type, I prefered Thick Eager Zeroed for infrastructure application.

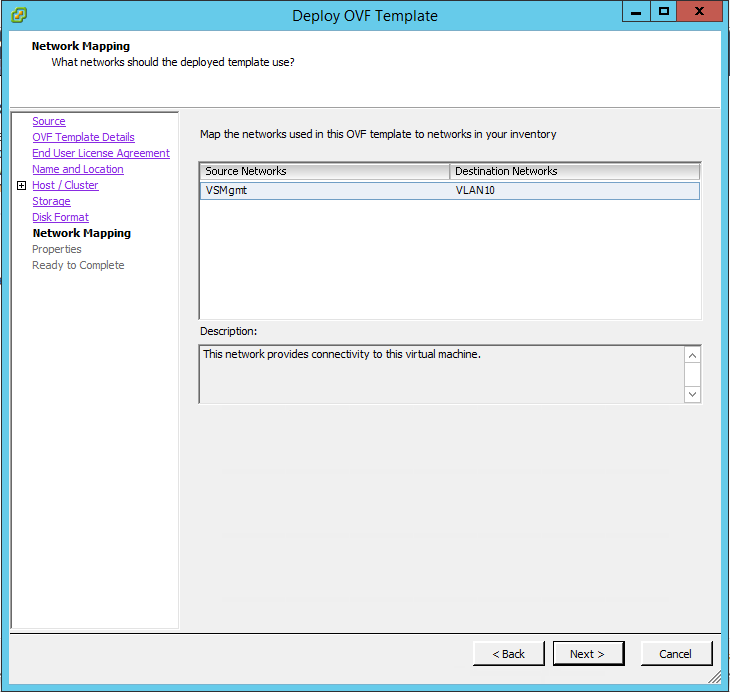
Map the VLAN for the NSX manager appliance, recommended to have a dedicated VLAN for NSX applications.
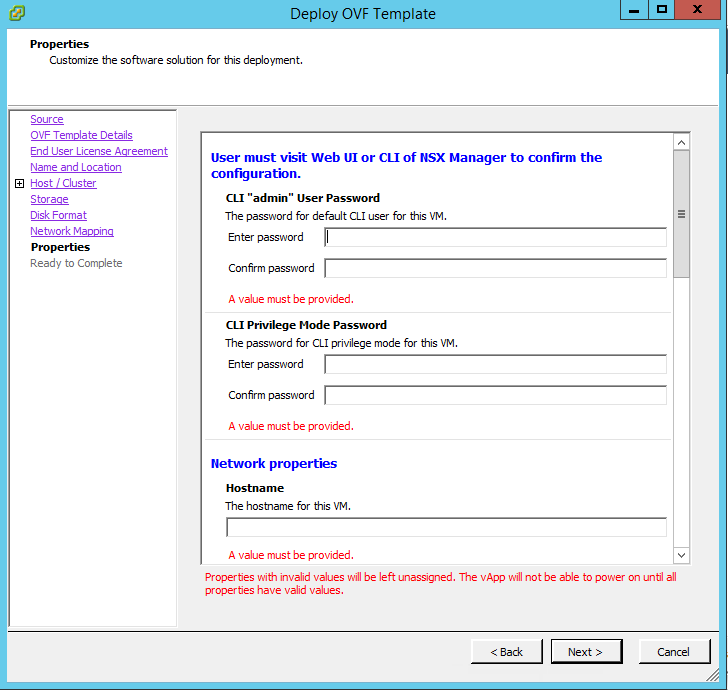
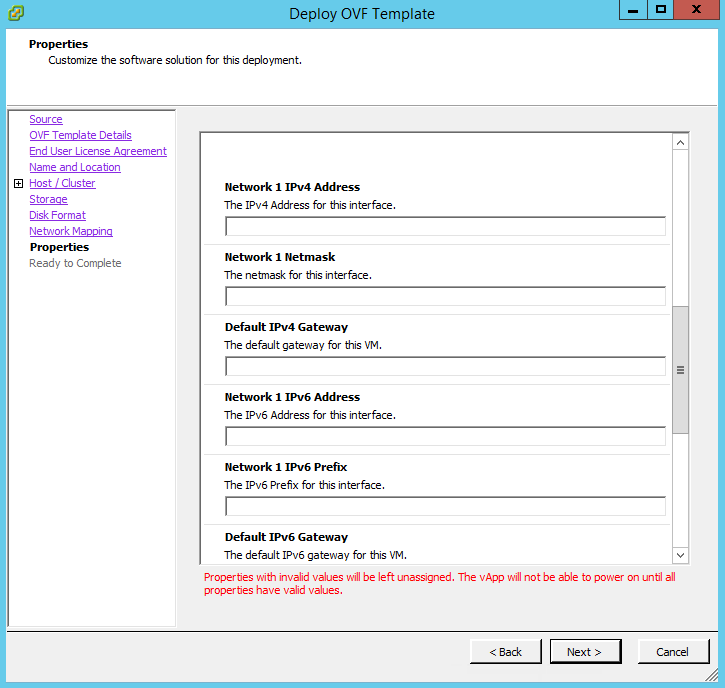
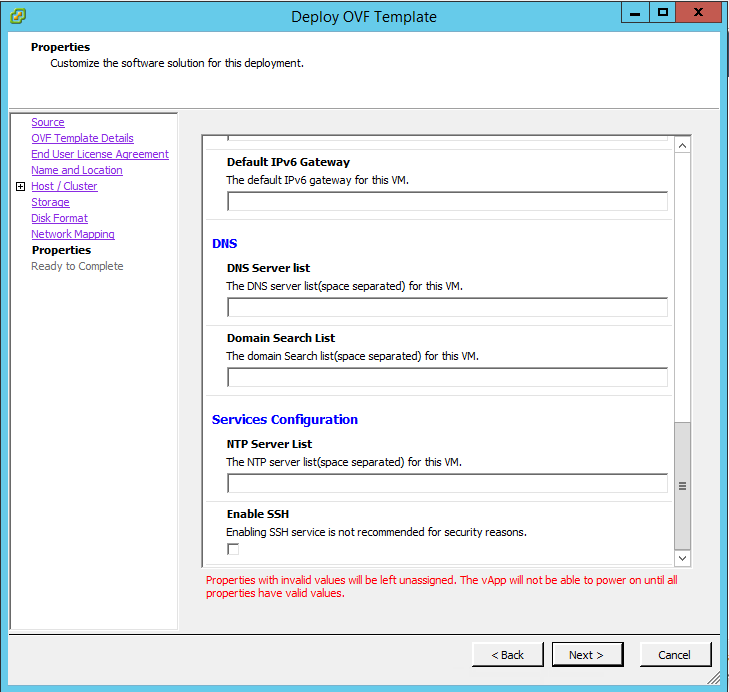
Provide all the information required by the appliance
- CLI admin password
- CLI Privilege Mode password
- HostName
- IPv4 Details
- IPv6 details
- NTP details
- If SSH should be enabled or not
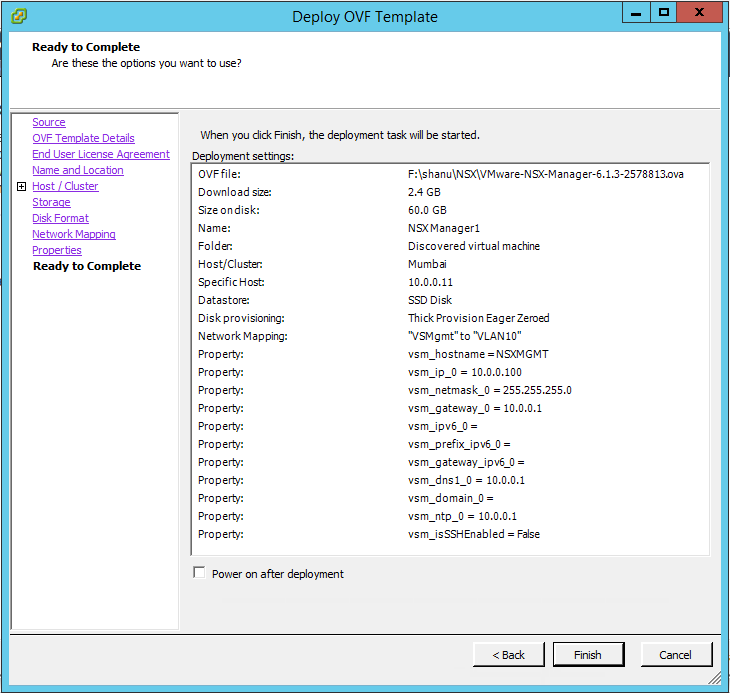
Review the deployment setting and select finish.
Virtual Appliance\NSX Manager configuration
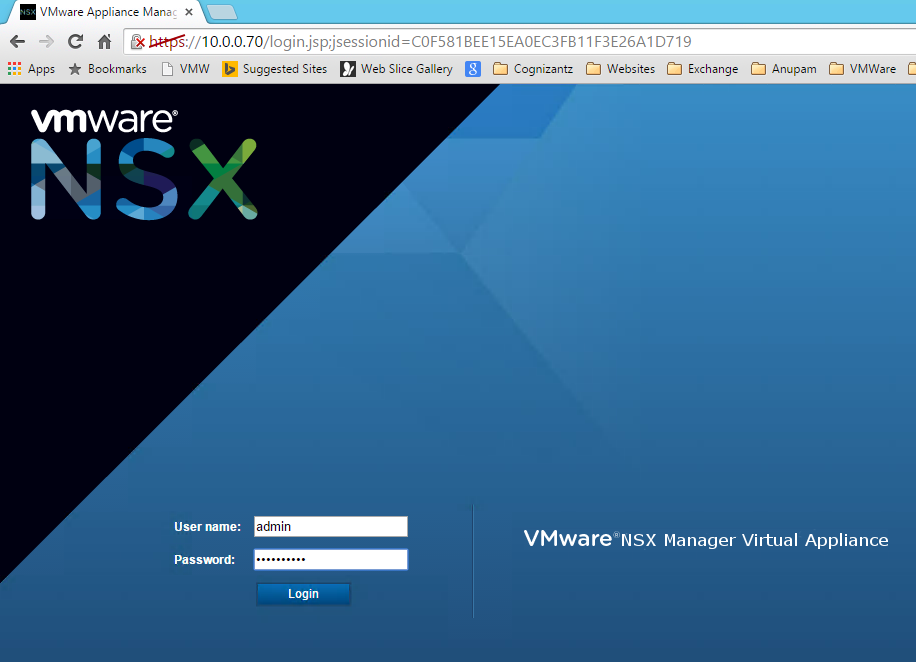
Once Deployment is complete, access the URL https://<IP of the appliance>/index.html
Below web page will load. Provide the username as admin and the password given before deployment.
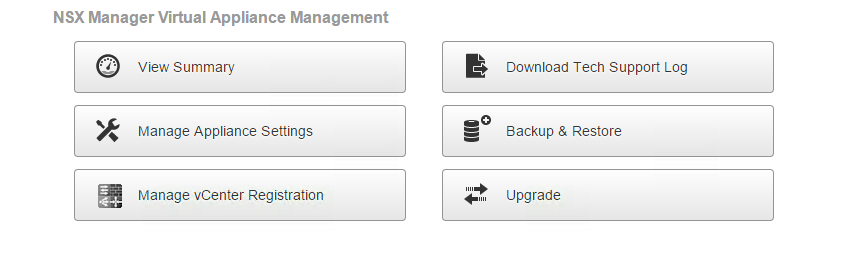
Once logged in we will find the menu tiles for summary, Manage Appliance Setting and more,
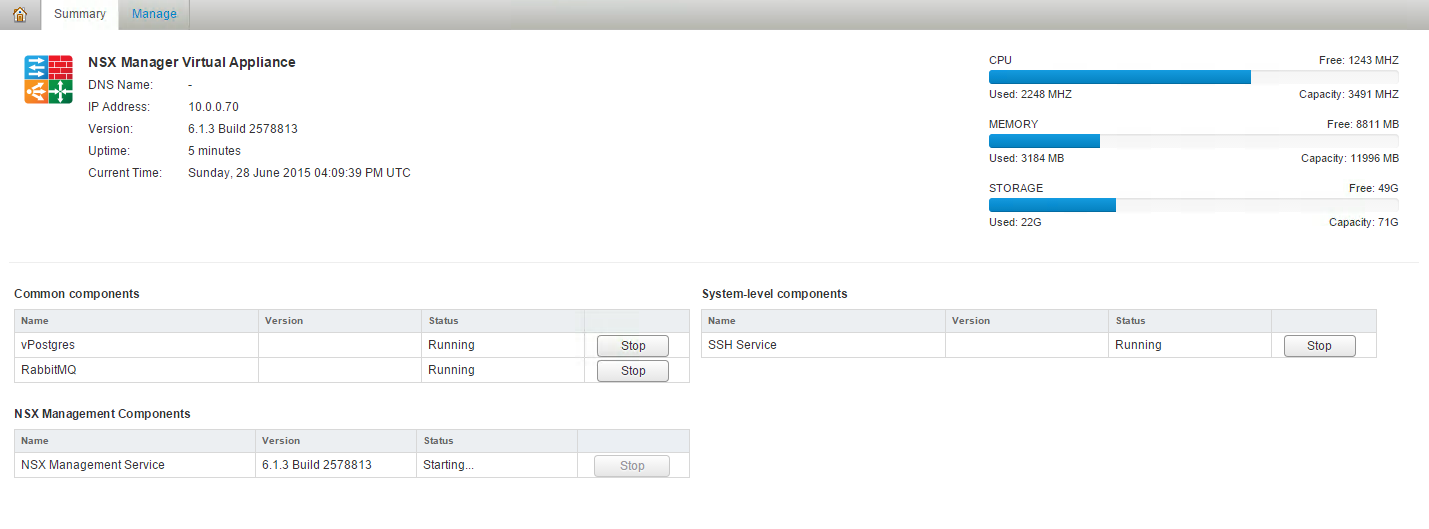
Select Summary and you will find the status of CPU, Memory, Storage and services. Make sure all the services are running including NSX management services.
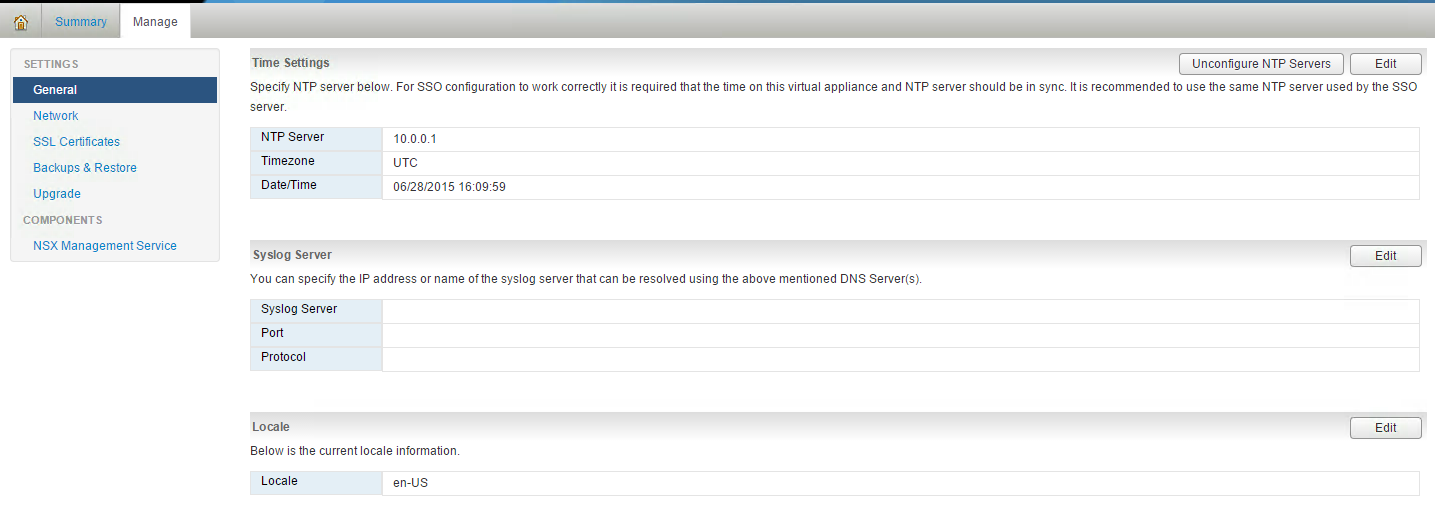
Once services start running, provide Syslog, NTP and location information
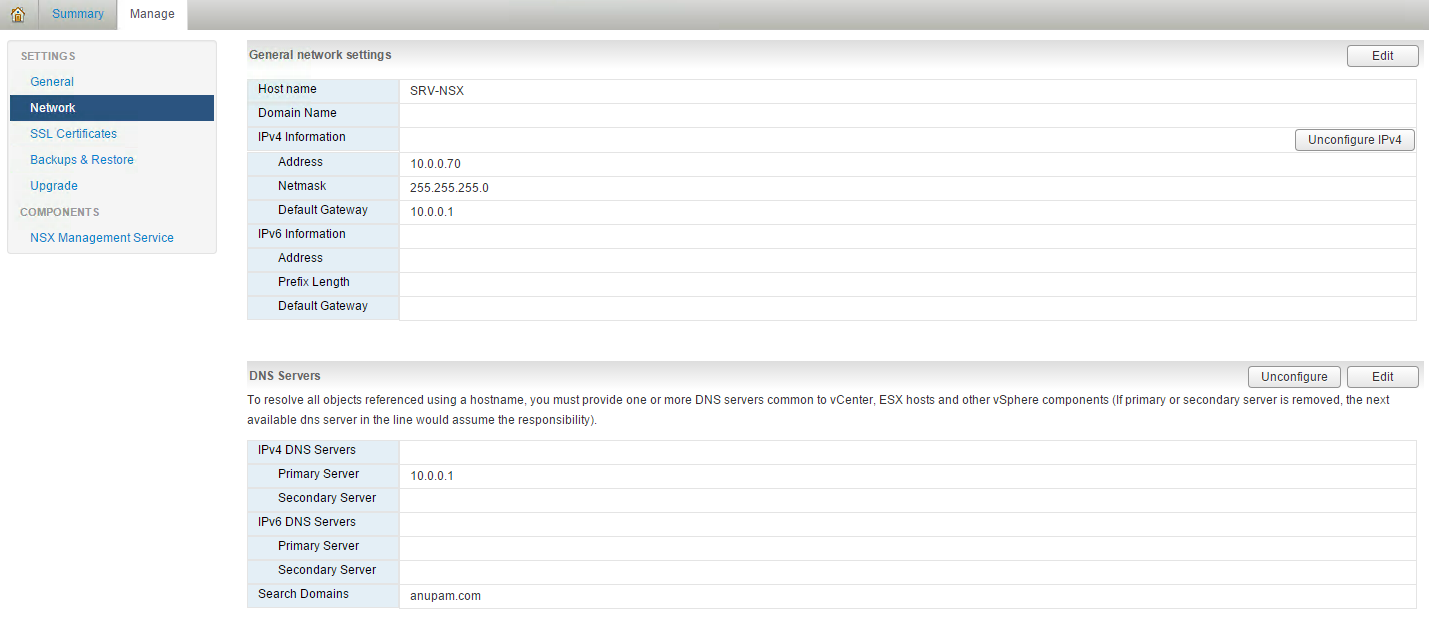
Cross verify the Network information and update the DNS details.
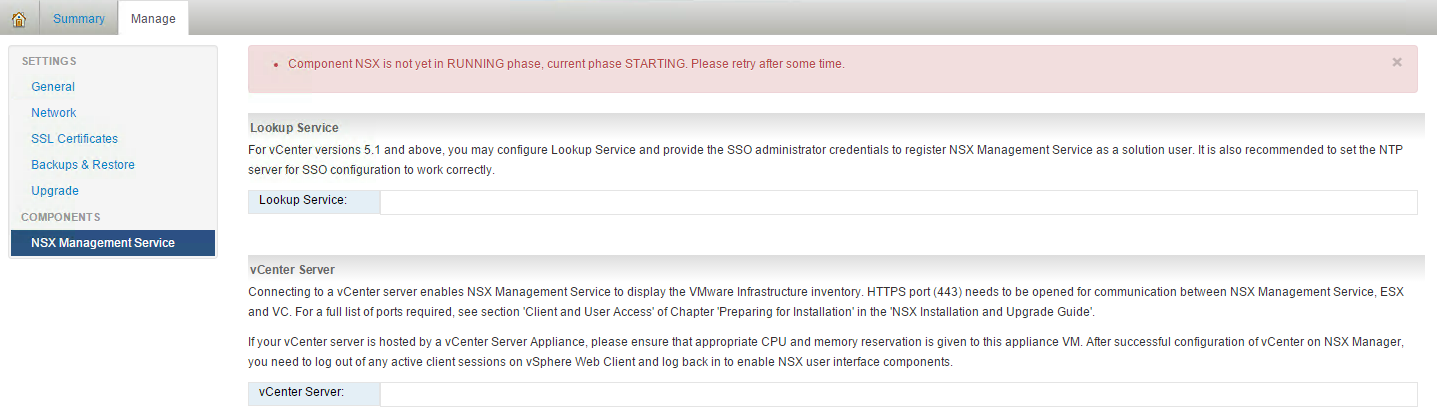
Go to NSX Management service and Update the SSO lookup service and vCenter information
Select Edit for providing the vCenter details
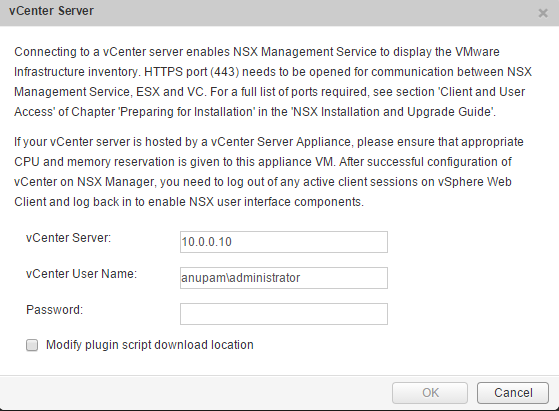
Once information is updated select ok and we can see status as connected.

Access NSX Manager via Web client
Post NSX appliance configuration login into VMware web client. We can see a new Item added as Networking & Security.
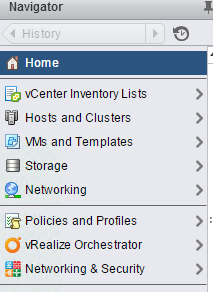
Once we select the Networking & Security option we can see the full categories of NSX features.
NSX Manager
NSX manager is the vsphere centralized management plane. its 1:1 mapping between NSX manager and the vCenter also it provide the management UI and API for NSX for vSphere.
With NSX Manager we can deploy and configure tools like NSX controller, Firewall, NSX Edge gateway and others.
So NSX Manager and vCenter are kept in same layer of Management called Management Plane


Having read this I thought it was really informative.
I appreciate you finding the time and energy to put this
article together. I once again find myself personally spending way too much
time both reading and leaving comments. But so what, it was still
worthwhile!